
一、Cobbler的工作原理
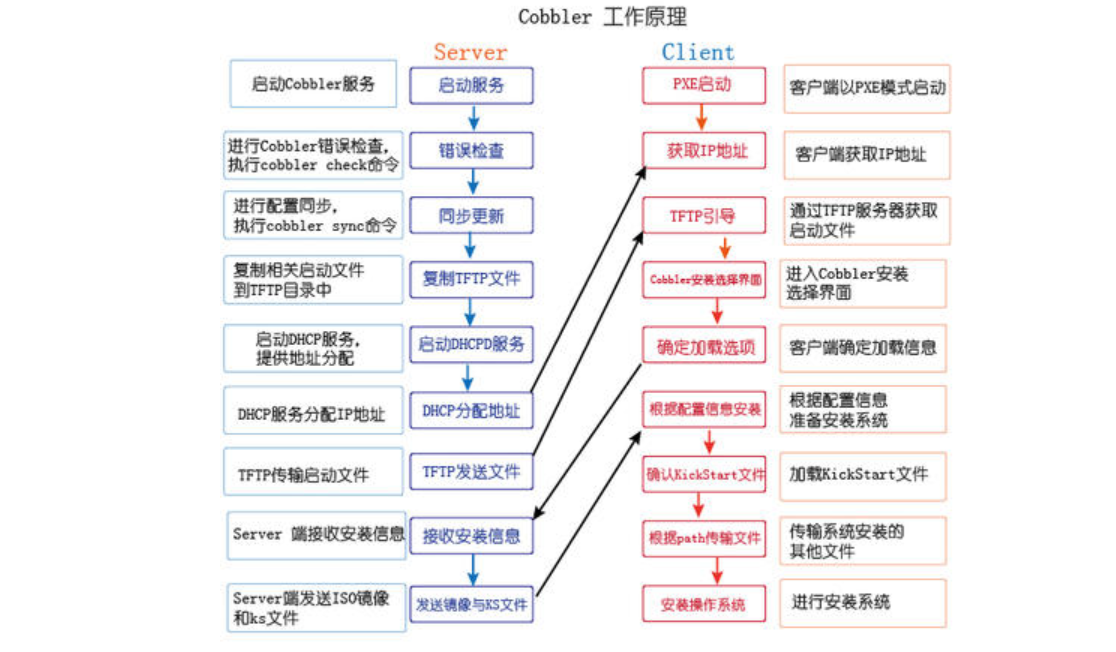
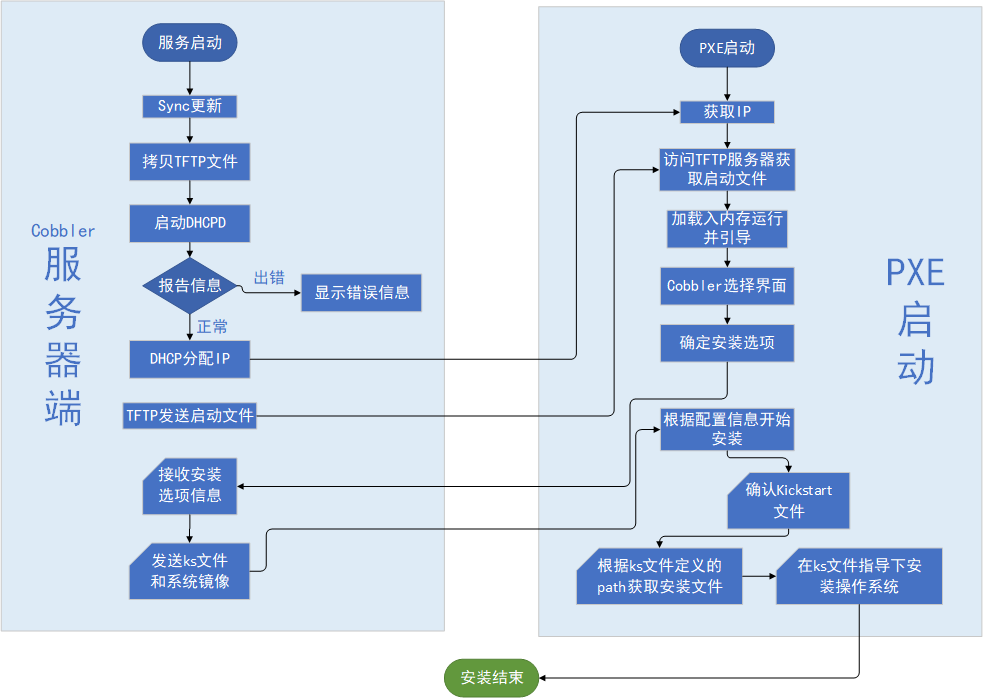
1.1、cobbler自动化安装系统流程
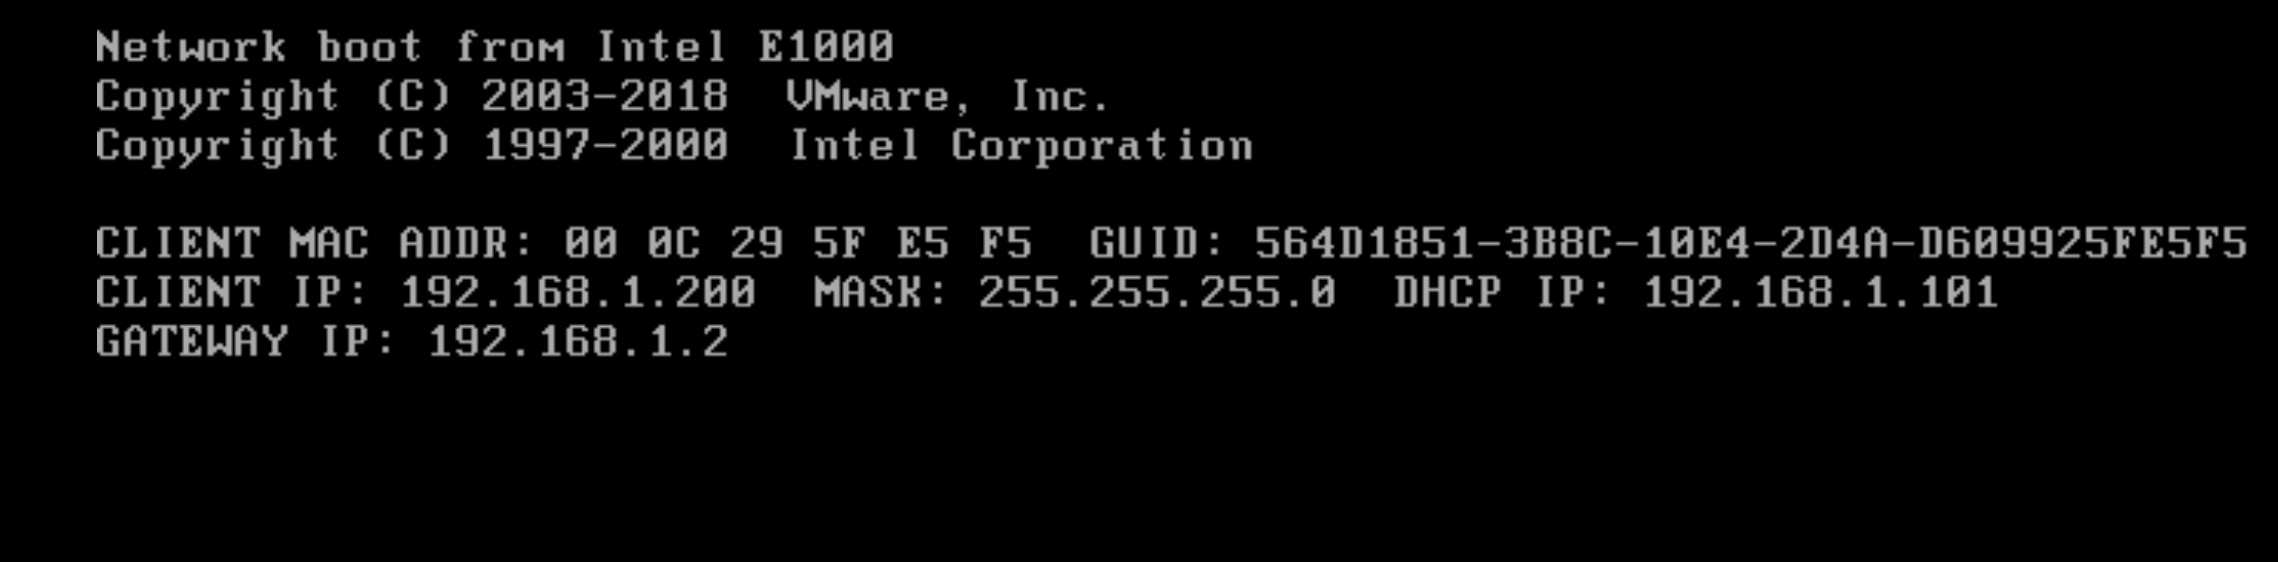
1.  client裸机配置了从网络启动后,开机后会广播包请求DHCP服务器(cobbler server)发送其分配好的一个IP

2.  DHCP服务器(cobbler server)收到请求后发送responese,包括其ip地址

3.  client裸机拿到ip后再向cobbler server发送请求OS引导文件的请求

4.  cobbler server告诉裸机OS引导文件的名字和TFTP server的ip和port

5.  client裸机通过上面告知的TFTP server地址通信,下载引导文件

6.  client裸机执行执行该引导文件,确定加载信息,选择要安装的os,期间会再向cobbler server请求kickstart文件和os image

7.  cobbler server发送请求的kickstart和os iamge

8.  client裸机加载kickstart文件

9.  client裸机接收os image,安装该os image
1.2、Cobbler配置文件及各目录情况
1.2.1 配置文件
[root@centos7 ~ ]# rpm -ql cobbler
/etc/cobbler                  # 配置文件目录
/etc/cobbler/settings         # cobbler主配置文件,这个文件是YAML格式,Cobbler是python写的程序。
/etc/cobbler/dhcp.template    # DHCP服务的配置模板
/etc/cobbler/tftpd.template   # tftp服务的配置模板
/etc/cobbler/rsync.template   # rsync服务的配置模板
/etc/cobbler/iso              # iso模板配置文件目录
/etc/cobbler/pxe              # pxe模板文件目录
/etc/cobbler/power            # 电源的配置文件目录
/etc/cobbler/users.conf       # Web服务授权配置文件
/etc/cobbler/users.digest     # 用于web访问的用户名密码配置文件
/etc/cobbler/dnsmasq.template # DNS服务的配置模板
/etc/cobbler/modules.conf     # Cobbler模块配置文件
1.2.2 数据目录
/var/lib/cobbler              # Cobbler数据目录
/var/lib/cobbler/config       # 配置文件
/var/lib/cobbler/kickstarts   # 默认存放kickstart文件
/var/lib/cobbler/loaders      # 存放的各种引导程序
1.2.3 镜像目录
/var/www/cobbler              # 系统安装镜像目录
/var/www/cobbler/ks_mirror    # 导入的系统镜像列表
/var/www/cobbler/images       # 导入的系统镜像启动文件
/var/www/cobbler/repo_mirror  # yum源存储目录
1.2.4 日志目录
/var/log/cobbler              # 日志目录
/var/log/cobbler/install.log  # 客户端系统安装日志
/var/log/cobbler/cobbler.log  # cobbler日志
二、Cobbler的部署
2.1 环境要求
要求:关闭iptables和selinux
| IP | 主机名 | 角色 |
|---|---|---|
| 192.168.1.101 | Cobbler.com | Cobbler |
| 192.168.1.200 | slave.com | slave |
2.2 安装cobbler的依赖包
[root@cobbler ~]# yum -y install epel-release
[root@cobbler ~]# yum install -y httpd dhcp tftp python-ctypes cobbler xinetd cobbler-web pykickstart
2.3 开启并自启动服务
[root@cobbler ~]# systemctl enable --now cobblerd
Created symlink from /etc/systemd/system/multi-user.target.wants/cobblerd.service to /usr/lib/systemd/system/cobblerd.service.
[root@cobbler ~]# systemctl enable --now httpd
Created symlink from /etc/systemd/system/multi-user.target.wants/httpd.service to /usr/lib/systemd/system/httpd.service
2.3.1 安装cobbler的配置文件
[root@cobbler ~]# rpm -ql cobbler
/etc/cobbler                  # 配置文件目录
/etc/cobbler/settings         # cobbler主配置文件,这个文件是YAML格式,Cobbler是python写的程序。
/etc/cobbler/dhcp.template    # DHCP服务的配置模板
/etc/cobbler/tftpd.template   # tftp服务的配置模板
/etc/cobbler/rsync.template   # rsync服务的配置模板
/etc/cobbler/iso              # iso模板配置文件目录
/etc/cobbler/pxe              # pxe模板文件目录
/etc/cobbler/power            # 电源的配置文件目录
/etc/cobbler/users.conf       # Web服务授权配置文件
/etc/cobbler/users.digest     # 用于web访问的用户名密码配置文件
/etc/cobbler/dnsmasq.template # DNS服务的配置模板
/etc/cobbler/modules.conf     # Cobbler模块配置文件
/var/lib/cobbler              # Cobbler数据目录
/var/lib/cobbler/config       # 配置文件
/var/lib/cobbler/kickstarts   # 默认存放kickstart文件
/var/lib/cobbler/loaders      # 存放的各种引导程序
/var/www/cobbler              # 系统安装镜像目录
/var/www/cobbler/ks_mirror    # 导入的系统镜像列表
/var/www/cobbler/images       # 导入的系统镜像启动文件
/var/www/cobbler/repo_mirror  # yum源存储目录
/var/log/cobbler              # 日志目录
/var/log/cobbler/install.log  # 客户端系统安装日志
/var/log/cobbler/cobbler.log  # cobbler日志
2.4 cobbler命令用法
[root@centos7 ~]#cobbler
usage
=====
cobbler <distro|profile|system|repo|image|mgmtclass|package|file> ...
        [add|edit|copy|getks*|list|remove|rename|report] [options|--help]
cobbler <aclsetup|buildiso|import|list|replicate|report|reposync|sync|validateks|version|signature|hardlink> [options|--help]

cobbler check    #核对当前设置是否有问题
cobbler list     #列出所有的cobbler元素
cobbler report   #列出元素的详细信息
cobbler sync     #同步配置到数据目录,更改配置最好都要执行下
cobbler reposync #同步yum仓库
cobbler distro   #查看导入的发行版系统信息
cobbler system   #查看添加的系统信息
cobbler profile  #查看配置信息
可以使用下面的方式得到使用帮助
[root@centos7 ~]#cobbler distro --help
usage
=====
cobbler distro add
cobbler distro copy
cobbler distro edit
cobbler distro find
cobbler distro list
cobbler distro remove
cobbler distro rename
cobbler distro report

[root@centos7 ~]#cobbler distro add --help
常见用法:
#列出当前导入的镜像列表
cobbler distro list
#显示当前导入安装细镜像详细信息
cobbler distro report

#向cobbler导入安装系统镜像文件
# --path 镜像路径
# --name 为安装源定义一个名字
# --arch 指定安装源是32位、64位、ia64, 目前支持的选项有: x86│x86_64│ia64
# 安装源的唯一标识就是根据name参数来定义,本例导入成功后,安装源的唯一标示就是:CentOS-7.1-x86_64,如果重复,系统会提示导入失败。
cobbler import --name=<导入镜像名> -path=<镜像路径> --arch=x86_64

#将kickstart文件,关联指定的YUM源和生成菜单列表
cobbler profile add --name=centos8_test --distro=centos8-x86_64 --kickstart=/var/lib/cobbler/kickstarts/centos8-ks.cfg
2.5 实战安装CentOS7
2.5.1 修改配置文件
[root@localhost ~]# vim /etc/cobbler/settings
......
# (dual homed, etc), you need to read the --server-override section
# of the manpage for how that works.
server: 192.168.1.101     ## 修改为本地IP
......
# of the cobbler server here so that PXE booting guests can find it
# if you do not set this correctly, this will be manifested in TFTP open timeouts.
next_server: 192.168.1.101    ## tftp服务的ip地址也填写为本地IP

# set to 1 to enable Cobbler's DHCP management features.
# the choice of DHCP management engine is in /etc/cobbler/modules.conf
manage_dhcp: 1    ##表示使用cobbler管理DHCP

# set to 1 to enable Cobbler's RSYNC management features.
manage_rsync: 1    ##表示使用cobbler来管理rsync
2.5.2 开启TFTP服务
[root@localhost ~]# cat /etc/xinetd.d/tftp
......
service tftp
{
        socket_type             = dgram
        protocol                = udp
        wait                    = yes
        user                    = root
        server                  = /usr/sbin/in.tftpd
        server_args             = -s /var/lib/tftpboot
        disable                 = no     ## 将状态修改为NO ,表示开启此服务
        per_source              = 11
        cps                     = 100 2
        flags                   = IPv4

[root@cobbler ~]# systemctl restart xinetd
[root@cobbler ~]# systemctl enable xinetd
2.5.3 下载cobbler相关系统启动引导文件
[root@cobbler ~]# cobbler get-loaders --force
task started: 2021-12-01_102525_get_loaders
task started (id=Download Bootloader Content, time=Wed Dec  1 10:25:25 2021)
downloading https://cobbler.github.io/loaders/README to /var/lib/cobbler/loaders/README
Exception occured: <class 'urlgrabber.grabber.URLGrabError'>
Exception value: [Errno 14] HTTPS Error 404 - Not Found
Exception Info:
  File "/usr/lib/python2.7/site-packages/cobbler/remote.py", line 82, in run
    rc = self._run(self)
   File "/usr/lib/python2.7/site-packages/cobbler/remote.py", line 176, in runner
    return self.remote.api.dlcontent(self.options.get("force",False), self.logger)
   File "/usr/lib/python2.7/site-packages/cobbler/api.py", line 735, in dlcontent
    return grabber.run(force)
   File "/usr/lib/python2.7/site-packages/cobbler/action_dlcontent.py", line 73, in run
    urlgrabber.grabber.urlgrab(src, filename=dst, proxies=proxies)
   File "/usr/lib/python2.7/site-packages/urlgrabber/grabber.py", line 773, in urlgrab
    return default_grabber.urlgrab(url, filename, **kwargs)
   File "/usr/lib/python2.7/site-packages/urlgrabber/grabber.py", line 1220, in urlgrab
    return _run_callback(opts.failfunc, opts)
   File "/usr/lib/python2.7/site-packages/urlgrabber/grabber.py", line 1071, in _run_callback
    return cb(obj)
   File "/usr/lib/python2.7/site-packages/urlgrabber/grabber.py", line 1065, in _do_raise
    raise obj.exception

!!! TASK FAILED !!!
[root@cobbler ~]#
注意:这个报错是因为cobbler的官方因为安全问题关闭了了TLS1.0导致的,但其实这个错误可以忽略,因为只要安装了syslinux,那么Cobbler可以不用额外下载其他引导文件,对于x86和x86_64的引导已经有了。除非你需要ARM和POWER架构的系统引导。
[root@cobbler ~]#cp -r /usr/share/syslinux/* /var/lib/cobbler/loaders/
[root@cobbler ~]# cd /var/lib/cobbler/loaders/
[root@cobbler loaders]# ls
altmbr.bin        cpuidtest.c32   gptmbr_f.bin     int18.com           ls.c32       pmload.c32    syslinux64.exe
altmbr_c.bin      diag            gpxecmd.c32      isohdpfx.bin        lua.c32      poweroff.com  syslinux.com
altmbr_f.bin      disk.c32        gpxelinux.0      isohdpfx_c.bin      mboot.c32    pwd.c32       syslinux.exe
cat.c32           dmitest.c32     gpxelinuxk.0     isohdpfx_f.bin      mbr.bin      pxechain.com  ver.com
chain.c32         dosutil         grub-x86_64.efi  isohdppx.bin        mbr_c.bin    pxelinux.0    vesainfo.c32
cmd.c32           elf.c32         grub-x86.efi     isohdppx_c.bin      mbr_f.bin    README        vesamenu.c32
config.c32        elilo-ia64.efi  hdt.c32          isohdppx_f.bin      memdisk      reboot.c32    vpdtest.c32
COPYING.elilo     ethersel.c32    host.c32         isolinux.bin        memdump.com  rosh.c32      whichsys.c32
COPYING.syslinux  gfxboot.c32     ifcpu64.c32      isolinux-debug.bin  meminfo.c32  sanboot.c32   yaboot
COPYING.yaboot    gptmbr.bin      ifcpu.c32        kbdmap.c32          menu.c32     sdi.c32       zzjson.c32
cpuid.c32         gptmbr_c.bin    ifplop.c32       linux.c32           pcitest.c32  sysdump.c32
2.5.4 开启rsync服务
[root@cobbler ~]# systemctl enable --now rsyncd
Created symlink from /etc/systemd/system/multi-user.target.wants/rsyncd.service to /usr/lib/systemd/system/rsyncd.service.
2.5.5 修改默认密码(默认密码为cobbler)
[root@cobbler ~]#  openssl passwd -1 -salt "$RANDOM" '123456'
$1$24635$oLHsemYCDNlogQ3nXkbqE/
#将随机生成的密码写入配置文件中
vim /etc/cobbler/settings

# cobbler has various sample kickstart templates stored
# in /var/lib/cobbler/kickstarts/.  This controls
# what install (root) password is set up for those
# systems that reference this variable.  The factory
# default is "cobbler" and cobbler check will warn if
# this is not changed.
# The simplest way to change the password is to run
# openssl passwd -1
# and put the output between the "" below.
default_password_crypted: "$1$24635$oLHsemYCDNlogQ3nXkbqE/"  ##配置密码
2.5.6 重启cobbler
[root@cobbler ~]# systemctl restart cobblerd
2.5.7 重新检查配置
[root@cobbler ~]# cobbler check
The following are potential configuration items that you may want to fix:

1 : debmirror package is not installed, it will be required to manage debian deployments and repositories
2 : fencing tools were not found, and are required to use the (optional) power management features. install cman or fence-agents to use them

Restart cobblerd and then run 'cobbler sync' to apply changes.
发现还有2处配置需要修改
注意:
1的错误为需要Debian的必备包,如果安装的客户机的系统没有Debian,则不需要处理。

2的错误是电源管理的工具没有安装,如果需要电源管理则需要,如没有则忽略。

我们没有这些配置,直接可以忽略掉。。
2.5.8 配置DHCP
注意:不要在DHCP的原文件中配置,否则会被cobbler覆盖
[root@cobbler ~]# vim /etc/cobbler/dhcp.template

ddns-update-style interim;

allow booting;
allow bootp;

ignore client-updates;
set vendorclass = option vendor-class-identifier;

option pxe-system-type code 93 = unsigned integer 16;

subnet 192.168.1.0 netmask 255.255.255.0 {    ##指定当前IP地址段
     option routers             192.168.1.2;   ##指定网关IP
     option domain-name-servers 192.168.1.2;
     option subnet-mask         255.255.255.0;
     range dynamic-bootp        192.168.1.200 192.168.1.210;   ##指定分配IP地址段
     default-lease-time         21600;
     max-lease-time             43200;
     next-server                $next_server;
2.5.9 完成后,重启cobbler服务
[root@cobbler ~]# systemctl restart cobblerd
[root@cobbler ~]# cobbler sync
task started: 2021-11-29_213640_sync
task started (id=Sync, time=Mon Nov 29 21:36:40 2021)
running pre-sync triggers
cleaning trees
。。。。。。。
running shell triggers from /var/lib/cobbler/triggers/sync/post/*
running python triggers from /var/lib/cobbler/triggers/change/*
running python trigger cobbler.modules.manage_genders
running python trigger cobbler.modules.scm_track
running shell triggers from /var/lib/cobbler/triggers/change/*
*** TASK COMPLETE ***
2.5.10 挂载ISO系统文件
[root@cobbler ~]# mount /dev/cdrom /mnt  ##挂载ISO
mount: /dev/sr0 is write-protected, mounting read-only

[root@cobbler ~]# cobbler import --path=/mnt --name=centos-7 --arch=x86_64  #导入镜像
task started: 2021-11-29_214405_import
task started (id=Media import, time=Mon Nov 29 21:44:05 2021)
Exception occured: <class 'cobbler.cexceptions.CX'>
Exception value: 'Command failed'
Exception Info:
  File "/usr/lib/python2.7/site-packages/cobbler/remote.py", line 82, in run
    rc = self._run(self)
   File "/usr/lib/python2.7/site-packages/cobbler/remote.py", line 227, in runner
    self.logger
   File "/usr/lib/python2.7/site-packages/cobbler/api.py", line 876, in import_tree
    utils.run_this(rsync_cmd, (spacer, mirror_url, path), self.logger)
   File "/usr/lib/python2.7/site-packages/cobbler/utils.py", line 899, in run_this
    die(logger,"Command failed")
   File "/usr/lib/python2.7/site-packages/cobbler/utils.py", line 114, in die
    raise CX(msg)
这个报错是镜像的问题,体积过大,我们更换了一个小一点的镜像,测试是没有问题的,如下
[root@cobbler ~]# cobbler import --path=/mnt --name=centos-7 --arch=x86_64
task started: 2021-11-29_220702_import
task started (id=Media import, time=Mon Nov 29 22:07:02 2021)
Found a candidate signature: breed=redhat, version=rhel6
Found a candidate signature: breed=redhat, version=rhel7
Found a matching signature: breed=redhat, version=rhel7
Adding distros from path /var/www/cobbler/ks_mirror/centos-7-x86_64:
creating new distro: centos-7-x86_64
trying symlink: /var/www/cobbler/ks_mirror/centos-7-x86_64 -> /var/www/cobbler/links/centos-7-x86_64
creating new profile: centos-7-x86_64
associating repos
checking for rsync repo(s)
checking for rhn repo(s)
checking for yum repo(s)
starting descent into /var/www/cobbler/ks_mirror/centos-7-x86_64 for centos-7-x86_64
processing repo at : /var/www/cobbler/ks_mirror/centos-7-x86_64
need to process repo/comps: /var/www/cobbler/ks_mirror/centos-7-x86_64
looking for /var/www/cobbler/ks_mirror/centos-7-x86_64/repodata/*comps*.xml
Keeping repodata as-is :/var/www/cobbler/ks_mirror/centos-7-x86_64/repodata
*** TASK COMPLETE ***
2.5.11 查看镜像列表信息
[root@cobbler ~]# cobbler distro report --name=centos-7-x86_64
Name                           : centos-7-x86_64
Architecture                   : x86_64
TFTP Boot Files                : {}
Breed                          : redhat
Comment                        :
Fetchable Files                : {}
Initrd                         : /var/www/cobbler/ks_mirror/centos-7-x86_64/images/pxeboot/initrd.img
Kernel                         : /var/www/cobbler/ks_mirror/centos-7-x86_64/images/pxeboot/vmlinuz
Kernel Options                 : {}
Kernel Options (Post Install)  : {}
Kickstart Metadata             : {'tree': 'http://@@http_server@@/cblr/links/centos-7-x86_64'}
Management Classes             : []
OS Version                     : rhel7
Owners                         : ['admin']
Red Hat Management Key         : <<inherit>>
Red Hat Management Server      : <<inherit>>
Template Files                 : {}

#查看镜像列表信息
[root@cobbler ~]# cobbler list
distros:
   centos-7-x86_64

profiles:
   centos-7-x86_64

systems:

repos:

images:

mgmtclasses:

packages:

files:


[root@localhost loaders]# cobbler profile report --name=centos-7-x86_64
Name                           : centos-7-x86_64
TFTP Boot Files                : {}
Comment                        :
DHCP Tag                       : default
Distribution                   : centos-7-x86_64
Enable gPXE?                   : 0
Enable PXE Menu?               : 1
Fetchable Files                : {}
Kernel Options                 : {}
Kernel Options (Post Install)  : {}
Kickstart                      : /var/lib/cobbler/kickstarts/sample_end.ks
Kickstart Metadata             : {}
Management Classes             : []
Management Parameters          : <<inherit>>
Name Servers                   : []
Name Servers Search Path       : []
Owners                         : ['admin']
Parent Profile                 :
Internal proxy                 :
Red Hat Management Key         : <<inherit>>
Red Hat Management Server      : <<inherit>>
Repos                          : []
Server Override                : <<inherit>>
Template Files                 : {}
Virt Auto Boot                 : 1
Virt Bridge                    : xenbr0
Virt CPUs                      : 1
Virt Disk Driver Type          : raw
Virt File Size(GB)             : 5
Virt Path                      :
Virt RAM (MB)                  : 512
Virt Type                      : kvm
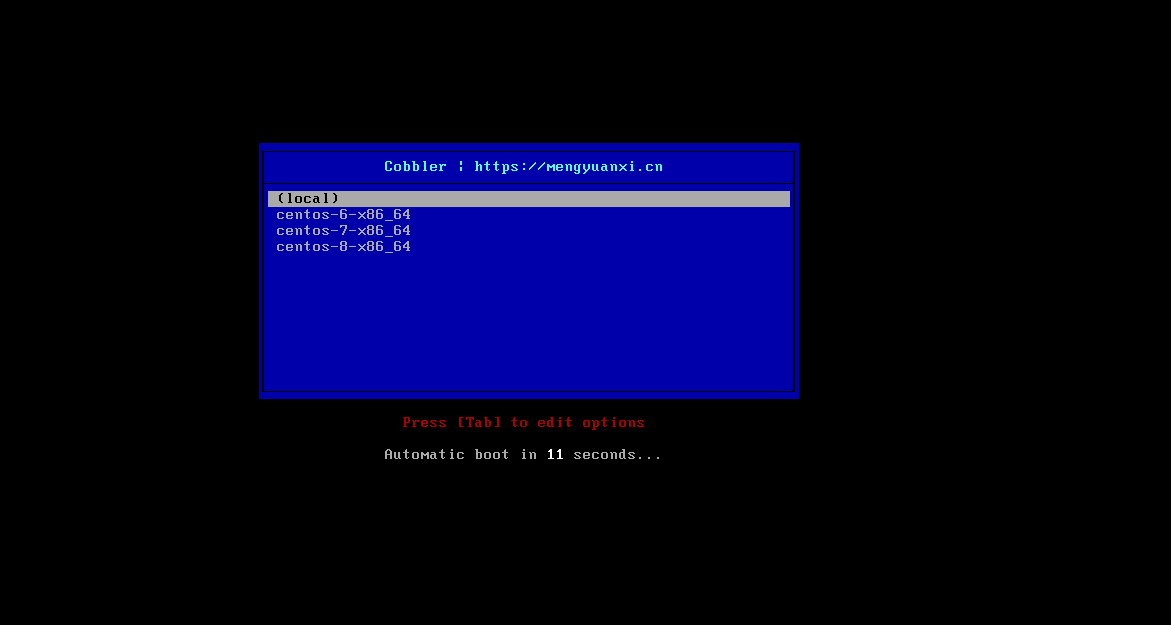
2.5.12 修改启动标题的提示信息
[root@localhost loaders]# cat /etc/cobbler/pxe/pxedefault.template
DEFAULT menu
PROMPT 0
MENU TITLE Cobbler | http://www.wcfeng.com
TIMEOUT 200
TOTALTIMEOUT 6000
ONTIMEOUT $pxe_timeout_profile

LABEL local
        MENU LABEL (local)
        MENU DEFAULT
        LOCALBOOT -1

$pxe_menu_items

MENU end

#同步配置
[root@localhost cobbler]# cobbler sync
2.5.13 测试安装
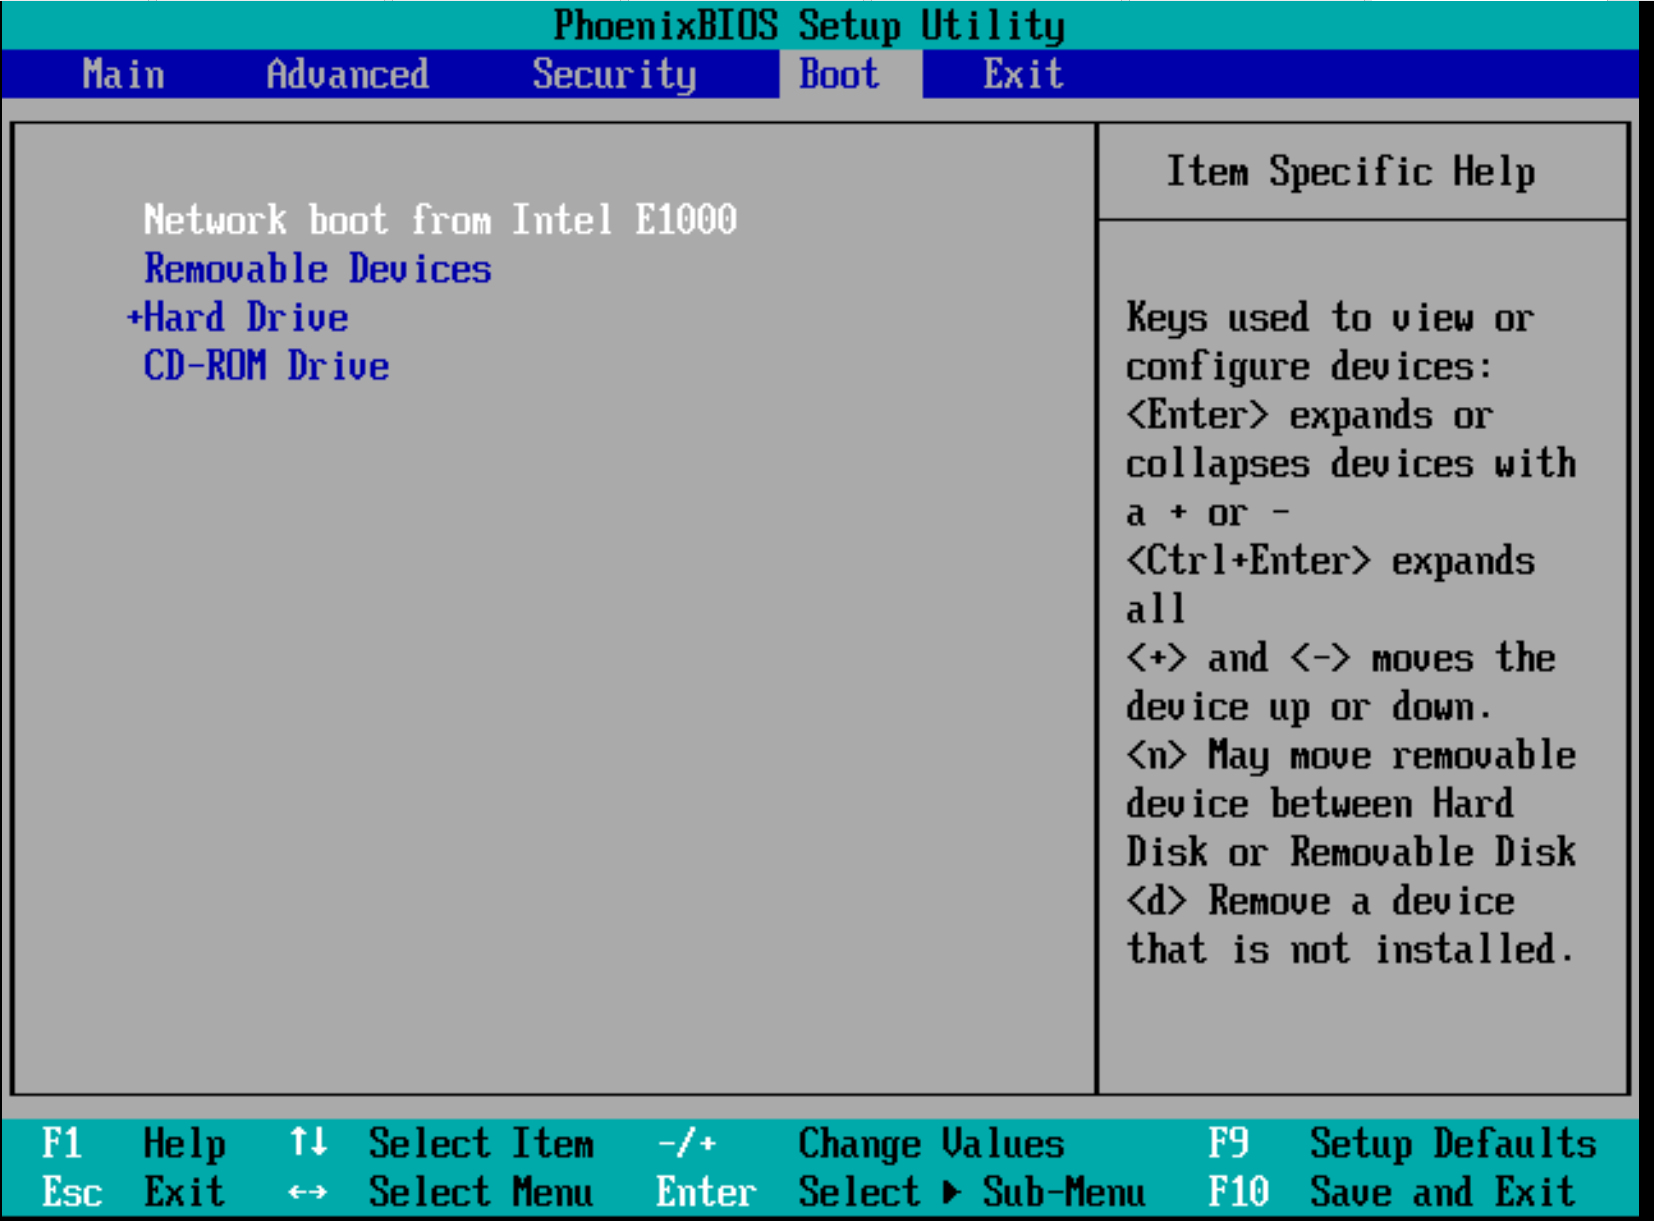
新建虚拟机,测试安装,将网卡调整到最优先启动
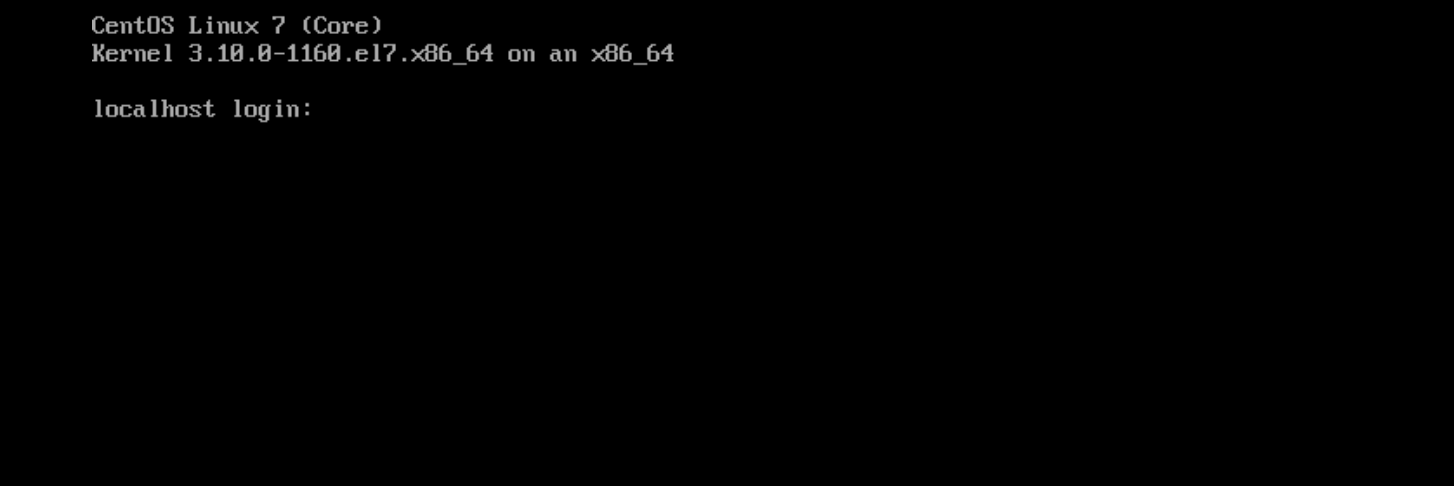
到此操作系统已经安装好了。
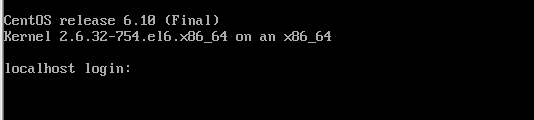
2.6 实战安装Centos6
2.6.1 导入光盘镜像
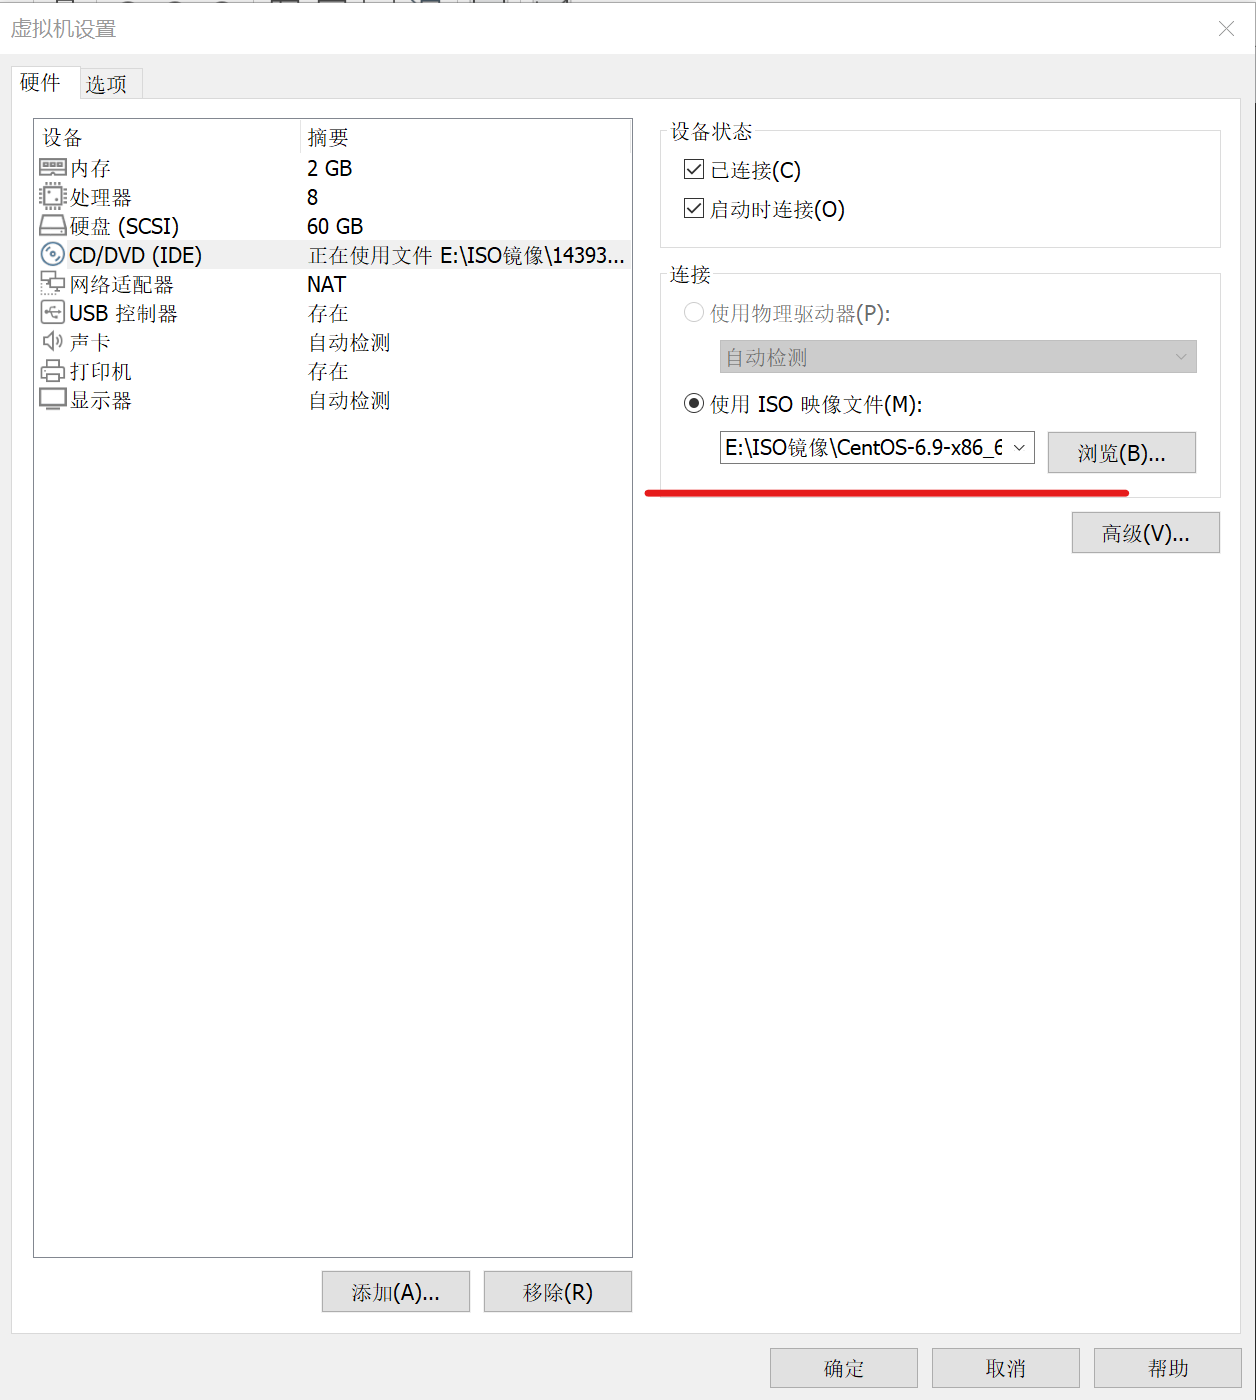
我们再次导入centos6的镜像。在此之前先更换一下本地的光盘镜像源
2.6.2 挂载光盘镜像,并导入centos6的镜像
[root@cobbler loaders]# mount /dev/cdrom /mnt
mount: /dev/sr0 is write-protected, mounting read-only
[root@cobbler kickstarts]# cobbler import --path=/mnt --name=centos-6 --arch=x86_64   ##导入镜像
task started: 2021-12-01_204250_import
task started (id=Media import, time=Wed Dec  1 20:42:50 2021)
2.6.3 定制化安装
这次我们手动来编辑一下ks文件
[root@cobbler kickstarts]# cd /var/lib/cobbler/kickstarts
[root@cobbler/var/lib/cobbler/kickstarts]# cp sample.ks ks.cfg
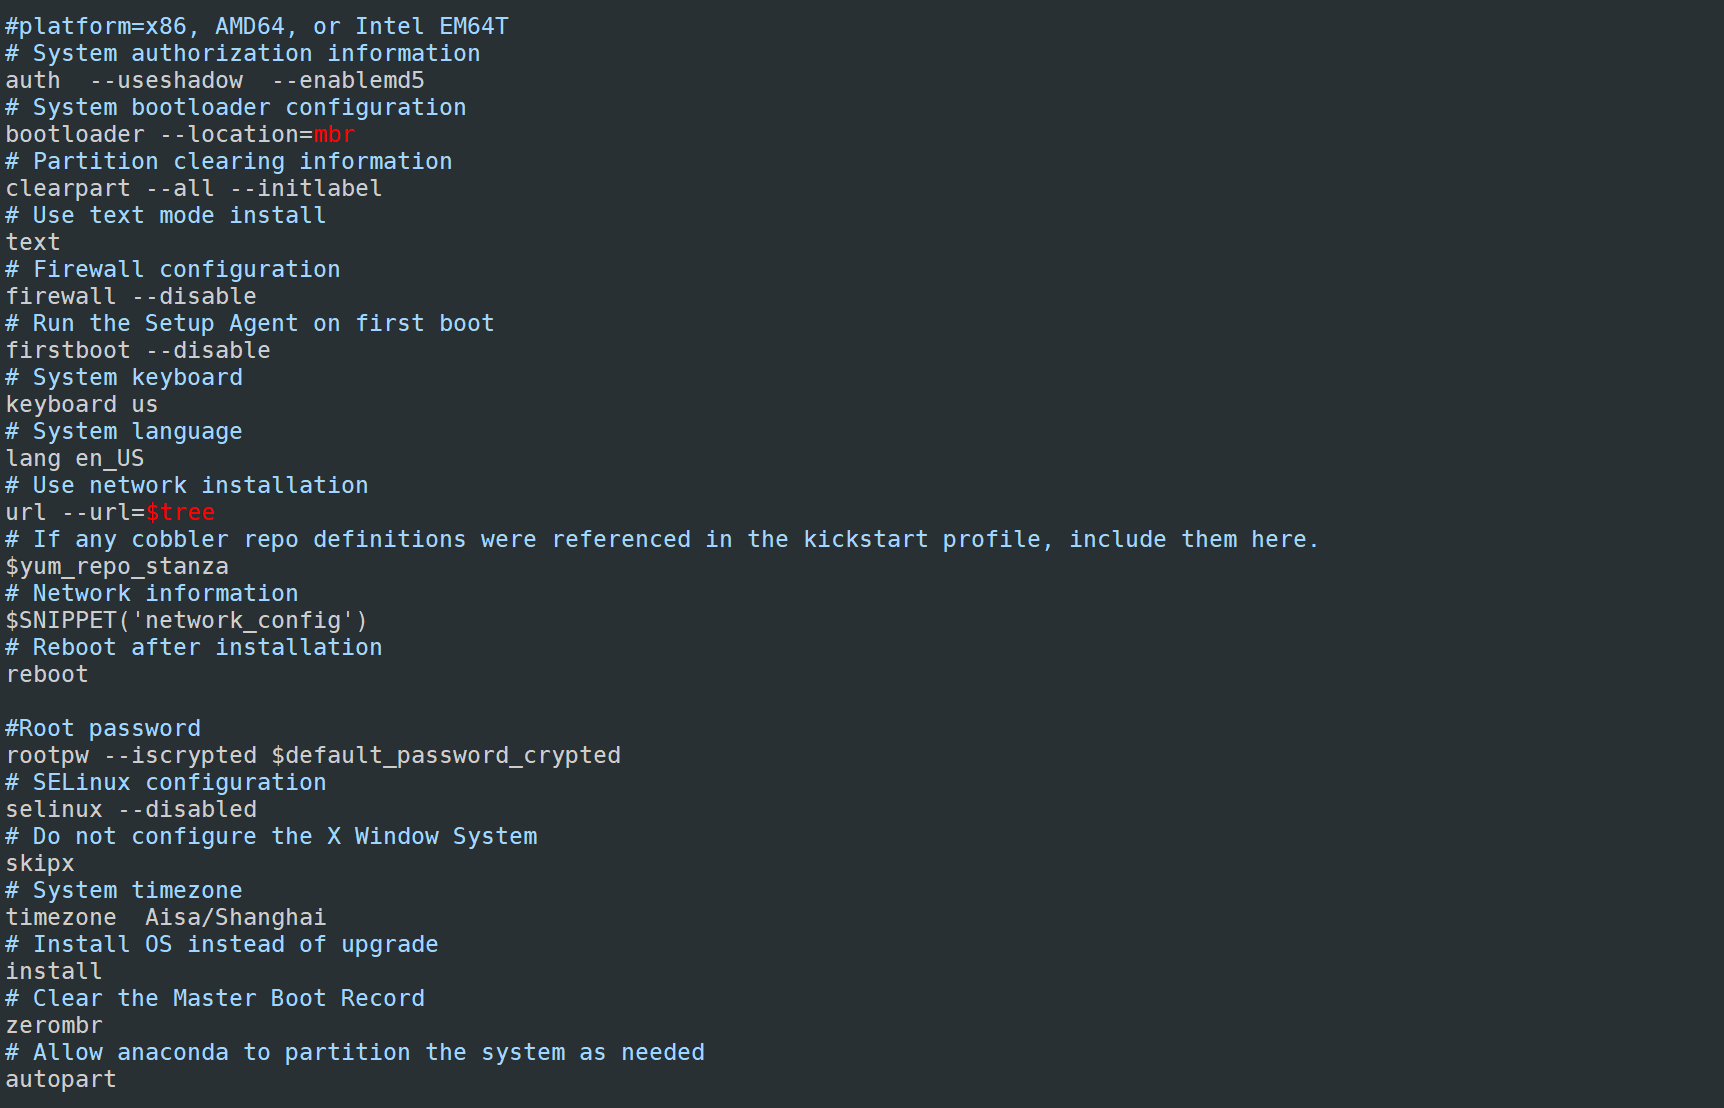
[root@cobbler/var/lib/cobbler/kickstarts]# cat sample.ks
# This kickstart file should only be used with RHEL 4, 5 and Fedora < 8.
# For newer distributions please use the sample_end.ks
#platform=x86, AMD64, or Intel EM64T
# System authorization information
auth --useshadow --enablemd5
# System bootloader configuration
bootloader --location=mbr
# Partition clearing information
clearpart --all --initlabel
# Use text mode install
text
# Firewall configuration
firewall --enabled
# Run the Setup Agent on first boot
firstboot --disable
# System keyboard
keyboard us
# System language
lang en_US
# Use network installation
url --url=$tree
# If any cobbler repo definitions were referenced in the kickstart profile, include them here.
$yum_repo_stanza
# Network information
$SNIPPET('network_config')
# Reboot after installation
reboot
#Root password
rootpw --iscrypted $default_password_crypted
# SELinux configuration
selinux --disabled
# Do not configure the X Window System
skipx
# System timezone
timezone America/New_York
# Install OS instead of upgrade
install
# Clear the Master Boot Record
zerombr
# Allow anaconda to partition the system as needed
autopart
%pre
$SNIPPET('log_ks_pre')
$SNIPPET('kickstart_start')
$SNIPPET('pre_install_network_config')
# Enable installation monitoring
$SNIPPET('pre_anamon')
%packages
$SNIPPET('func_install_if_enabled')
$SNIPPET('puppet_install_if_enabled')
%post --nochroot
$SNIPPET('log_ks_post_nochroot')
%end
%post
$SNIPPET('log_ks_post')
# Start yum configuration
$yum_config_stanza
# End yum configuration
$SNIPPET('post_install_kernel_options')
$SNIPPET('post_install_network_config')
$SNIPPET('func_register_if_enabled')
$SNIPPET('puppet_register_if_enabled')
$SNIPPET('download_config_files')
$SNIPPET('koan_environment')
$SNIPPET('redhat_register')
$SNIPPET('cobbler_register')
# Enable post-install boot notification
$SNIPPET('post_anamon')
# Start final steps
$SNIPPET('kickstart_done')
# End final steps
2.6.4 动态编辑指定使用新的kickstart文件
[root@cobbler kickstarts]# cobbler profile edit --name=centos-6-x86_64 --kickstart=/var/lib/cobbler/kickstarts/ks.cfg
2.6.5 同步配置
[root@cobbler kickstarts]# cobbler sync
task started: 2021-12-01_205610_sync
task started (id=Sync, time=Wed Dec  1 20:56:10 2021)
running pre-sync triggers
cleaning trees
removing: /var/www/cobbler/images/centos-7-x86_64
removing: /var/www/cobbler/images/centos-6-x86_64
removing: /var/lib/tftpboot/pxelinux.cfg/default
.......省略.....
running shell triggers from /var/lib/cobbler/triggers/sync/post/*
running python triggers from /var/lib/cobbler/triggers/change/*
running python trigger cobbler.modules.manage_genders
running python trigger cobbler.modules.scm_track
running shell triggers from /var/lib/cobbler/triggers/change/*
*** TASK COMPLETE ***
2.6.6 新建虚拟机测试
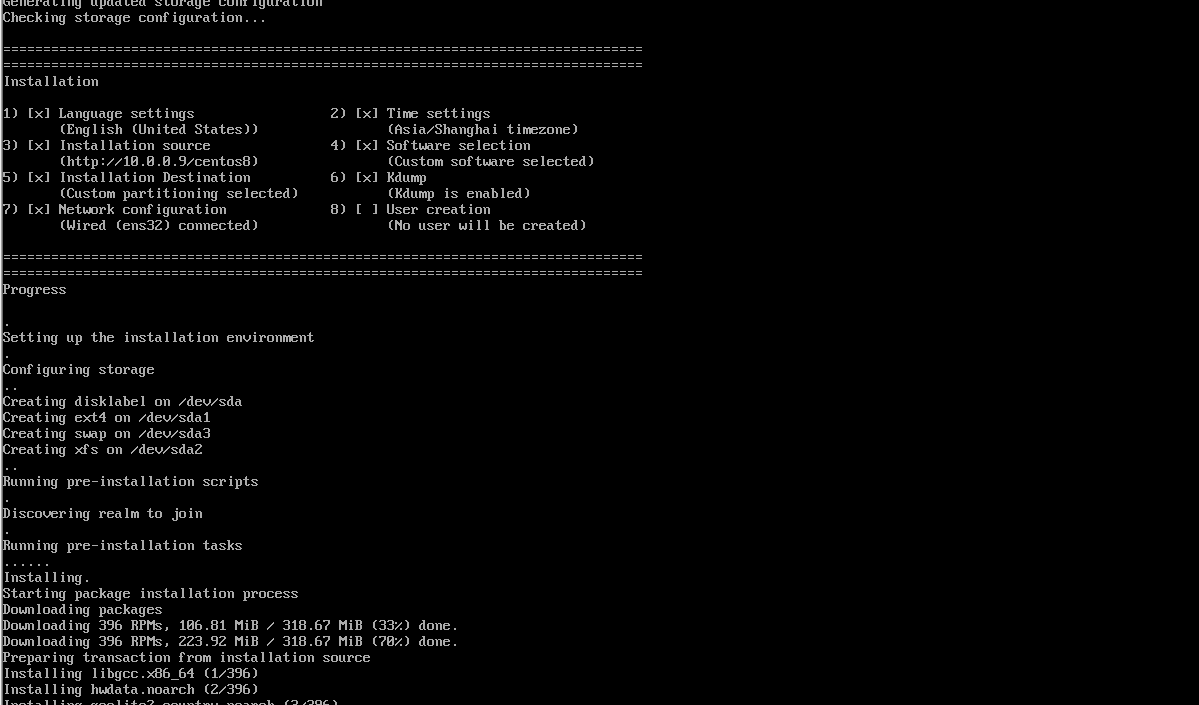
2.7 实战安装CentOS8
- 前面挂载的操作一样,CentOS8的配置文件因为与6和7 不兼容,所以需要单独配置。
2.7.1 定制化安装
root@cobbler/var/lib/cobbler/kickstarts]$ cat ks_centos8.cfg
ignoredisk --only-use=sda
zerombr
text
reboot
selinux --disabled
firewall --disabled
keyboard --vckeymap=us --xlayouts='us'
lang en_US.UTF-8
rootpw --plaintext 123456
firstboot --enable
skipx
timezone Asia/Shanghai --isUtc --nontp

network  --bootproto=dhcp --device=eth0
network  --hostname=centos8

url --url=http://10.0.0.9/centos8

clearpart --all --initlabel
part / --fstype="xfs" --ondisk=sda --size=20000
part swap --fstype="swap" --ondisk=sda --size=2048
part /boot --fstype="ext4" --ondisk=sda --size=1024

services --disabled="chronyd"
%packages
@^minimal-environment
kexec-tools
%end
%addon com_redhat_kdump --enable --reserve-mb='auto'
%end

%anaconda
pwpolicy root --minlen=6 --minquality=1 --notstrict --nochanges --notempty
pwpolicy user --minlen=6 --minquality=1 --notstrict --nochanges --emptyok
pwpolicy luks --minlen=6 --minquality=1 --notstrict --nochanges --notempty
%end

%post
useradd wu
echo 123456 | passwd --stdin wu &> /dev/null
%end
2.7.2 动态编辑指定使用新的kickstart文件
[root@cobbler/var/lib/cobbler/kickstarts]$ cobbler profile edit --name=centos-8-x86_64 --kickstart=/var/lib/cobbler/kickstarts/ks_centos8.cfg
2.7.3 同步配置
[root@cobbler/var/lib/cobbler/kickstarts]$ cobbler sync

# 列出
[root@cobbler/var/lib/cobbler/kickstarts]$ cobbler list
distros:
   centos-6-x86_64
   centos-7-x86_64
   centos-8-x86_64

profiles:
   centos-6-x86_64
   centos-7-x86_64
   centos-8-x86_64

systems:

repos:

images:

mgmtclasses:

packages:

files:
2.7.4 新建虚拟机测试
三、Cobbler-Web界面
3.1 安装cobbler-web
[root@centos7 ~]#yum install cobbler-web -y
[root@centos7 ~]#systemctl restart cobblerd.service
3.2 访问web界面
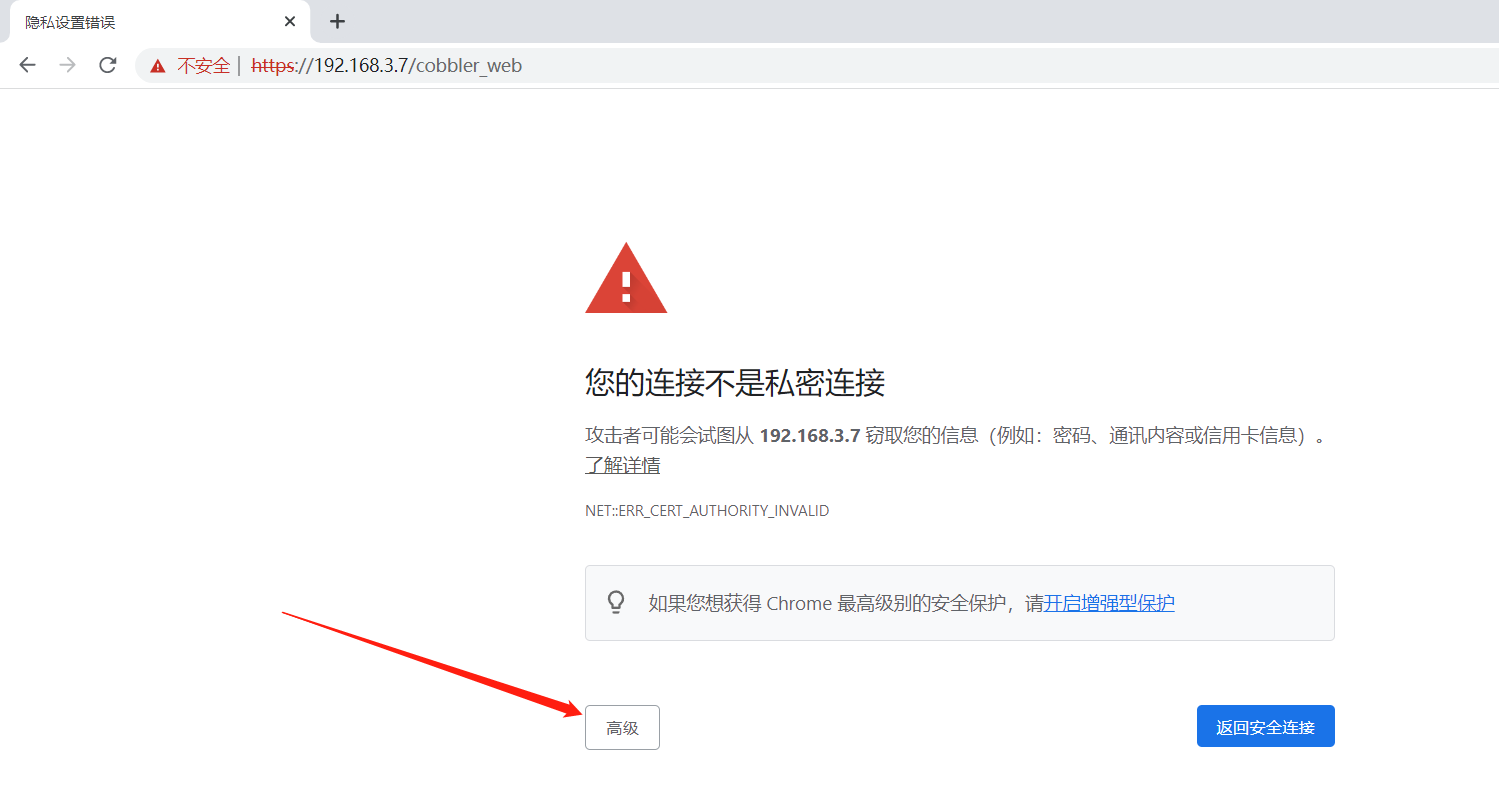
用浏览器访问:https://cobblerserver/cobbler_web
https://192.168.3.7/cobbler_web
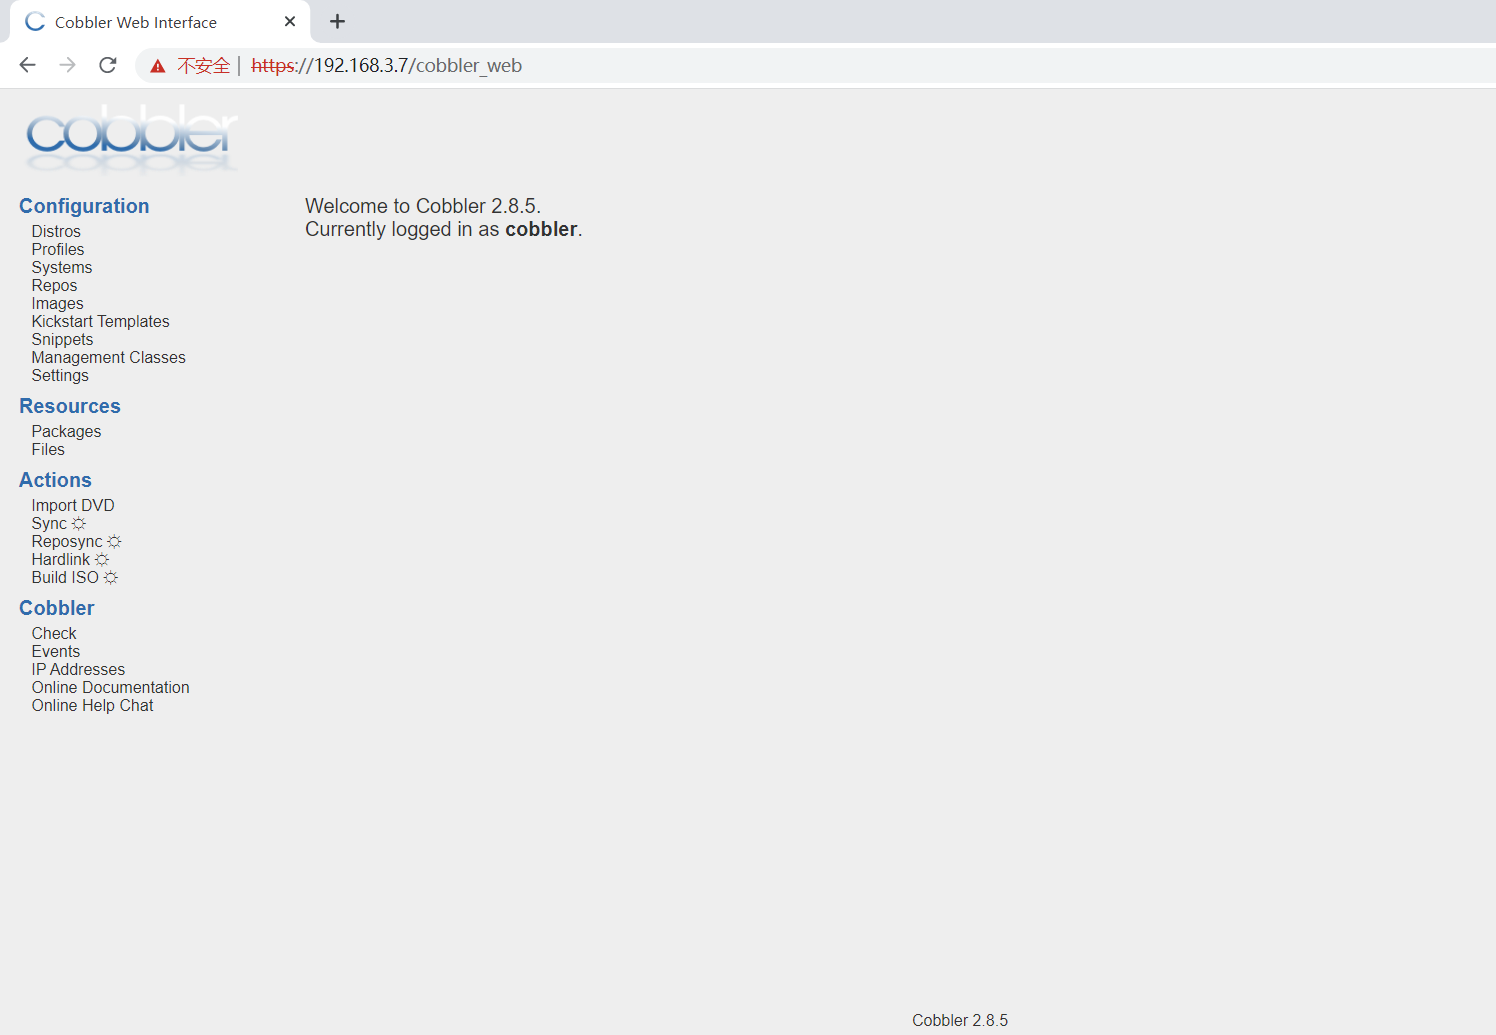
cobbler-web界面的默认账号,用户名:cobbler 密码:cobbler
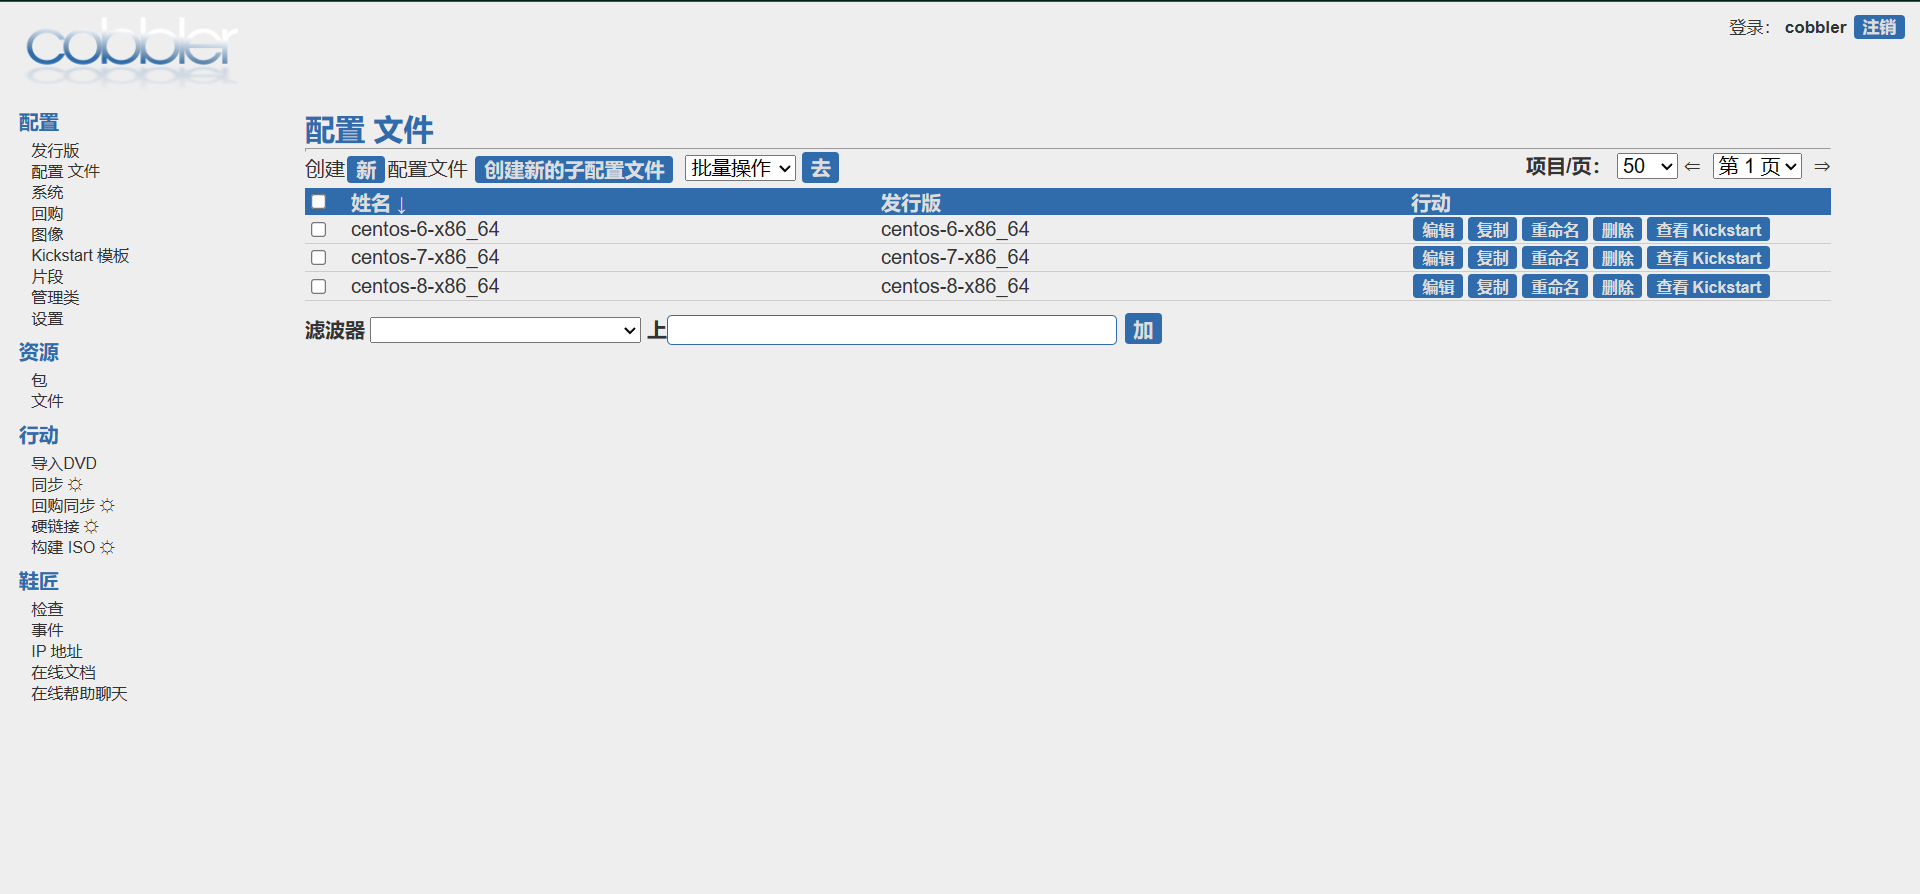
cobbler访问图示
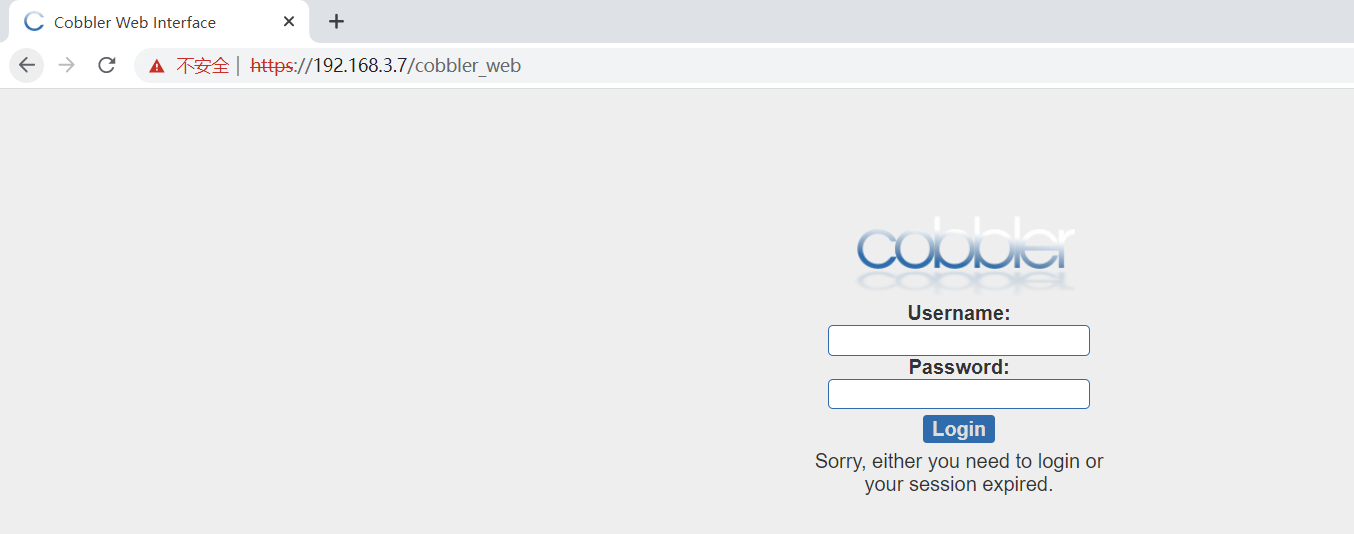
默认账户密码都是:cobbler
3.3 WEB的登录认证方式
认证方法配置文件:/etc/cobbler/modules.conf
支持多种认证方法:
- /etc/cobbler/users.digest,此为默认的认证方法
- authn_pam
使用authn_configfile模块认证cobbler_web用户
[root@centos7 ~]#vim /etc/cobbler/modules.conf
[authentication]
module=authn_configfile
创建其认证文件/etc/cobbler/users.digest,并添加所需的用户
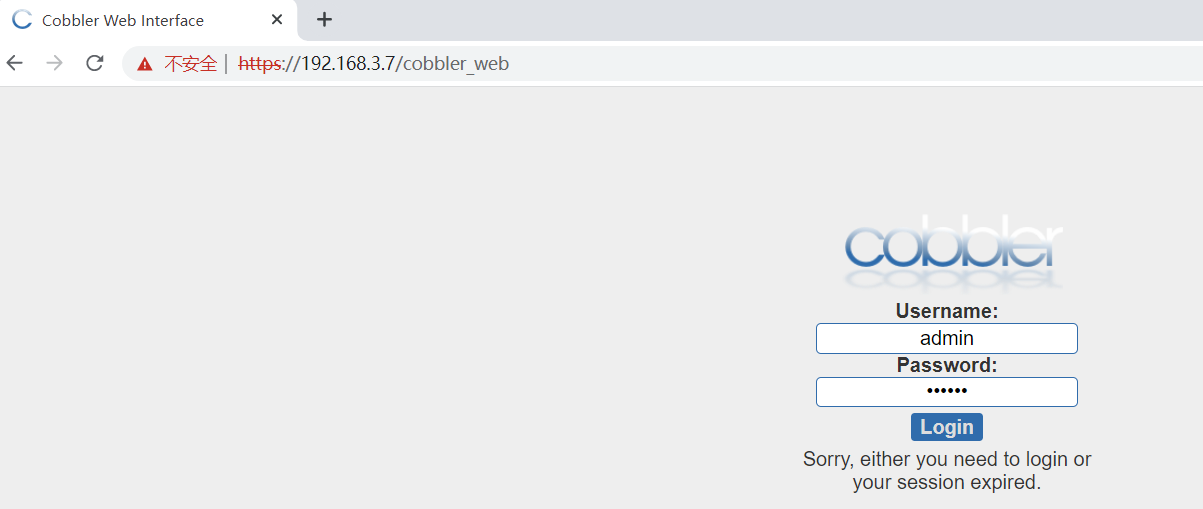
[root@centos7 ~]#htdigest -c /etc/cobbler/users.digest Cobbler admin
Adding password for admin in realm Cobbler.
New password:            #输入密码
Re-type new password:    #确认密码
使用已有用户文件,在其中添加新用户
htdigest /etc/cobbler/users.digest Cobbler admin1
注意:
- 使用“-c”选项用于创建用户文件,如果文件已存在,将覆盖原文件
- cobbler_web的realm只能为Cobbler
使用authn_pam模块认证cobbler_web用户
#修改cobbler认证模块
[root@centos7 ~ ]# vim /etc/cobbler/modules.conf
[authentication]
#module = authn_configfile
module = authn_pam

[root@centos7 ~ ]# systemctl restart cobblerd

#创建系统用户作为cobbler管理用户
[root@centos7 ~ ]# useradd -s /sbin/nologin cobbleruser
[root@centos7 ~ ]# echo 123456 | passwd --stdin cobbleruser
Changing password for user cobbleruser.
passwd: all authentication tokens updated successfully.

[root@centos7 ~ ]# vim /etc/cobbler/users.conf
[admins]
admin = "cobbleruser"

[root@centos7 ~]#systemctl restart cobblerd
3.4 Trouble Shooting
3.4.1 故障1
这种情况是ks文件中的安装源路径出错,改为如下:
centos6: url --url=http://httpserver/ksdir/ks.cfg 或者 url --url=$tree
centos7: url --url=http://httpserver/ksdir/ks.cfg 或者 url --url=$tree
centos8: url --url=http://httpserver/ksdir/ks.cfg 或者 url --url=$tree
3.4.2 故障2
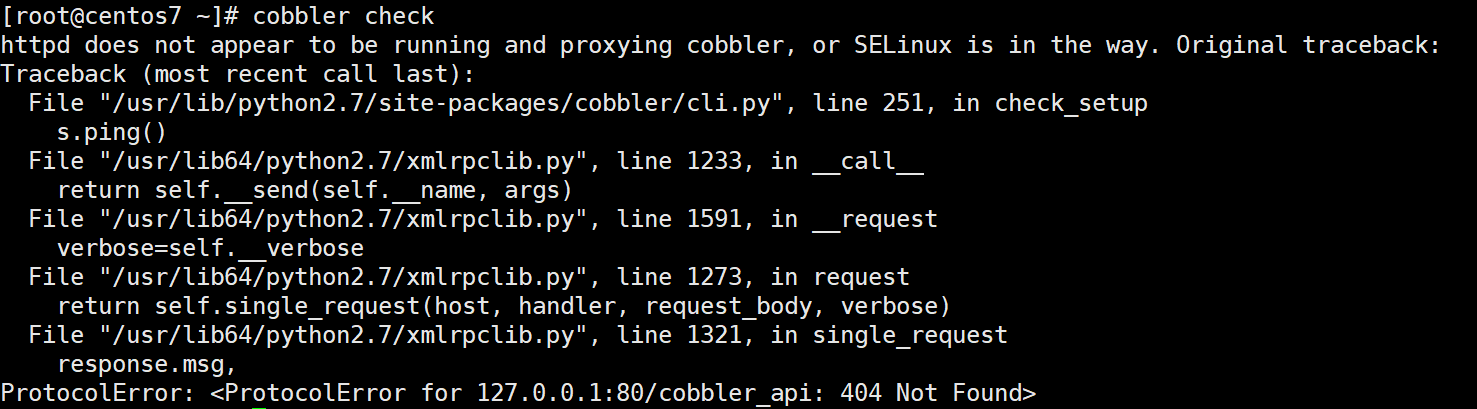
这种情况是因为在安装配置cobbler时httpd服务一直在运行中,没有正确的为cobbler提供服务,因此重启httpd服务就ok了 , systemctl restart httpd
3.4.3 故障3
httpd服务运行中安装cobbler-web包后无法访问https://cobblerserver/cobbler-web管理界面
yum源更新后的Django版本和cobbler不兼容,更新cobbler 2.8.5新版后,此故障已修复
#提示如果无法打开web页面,可以执行面操作
[root@centos7 ~]#yum install python2-pip

#安装指定版本的Django
[root@centos7 ~]#pip install Django==1.8.17
[root@centos7 ~]#systemctl restart httpd
